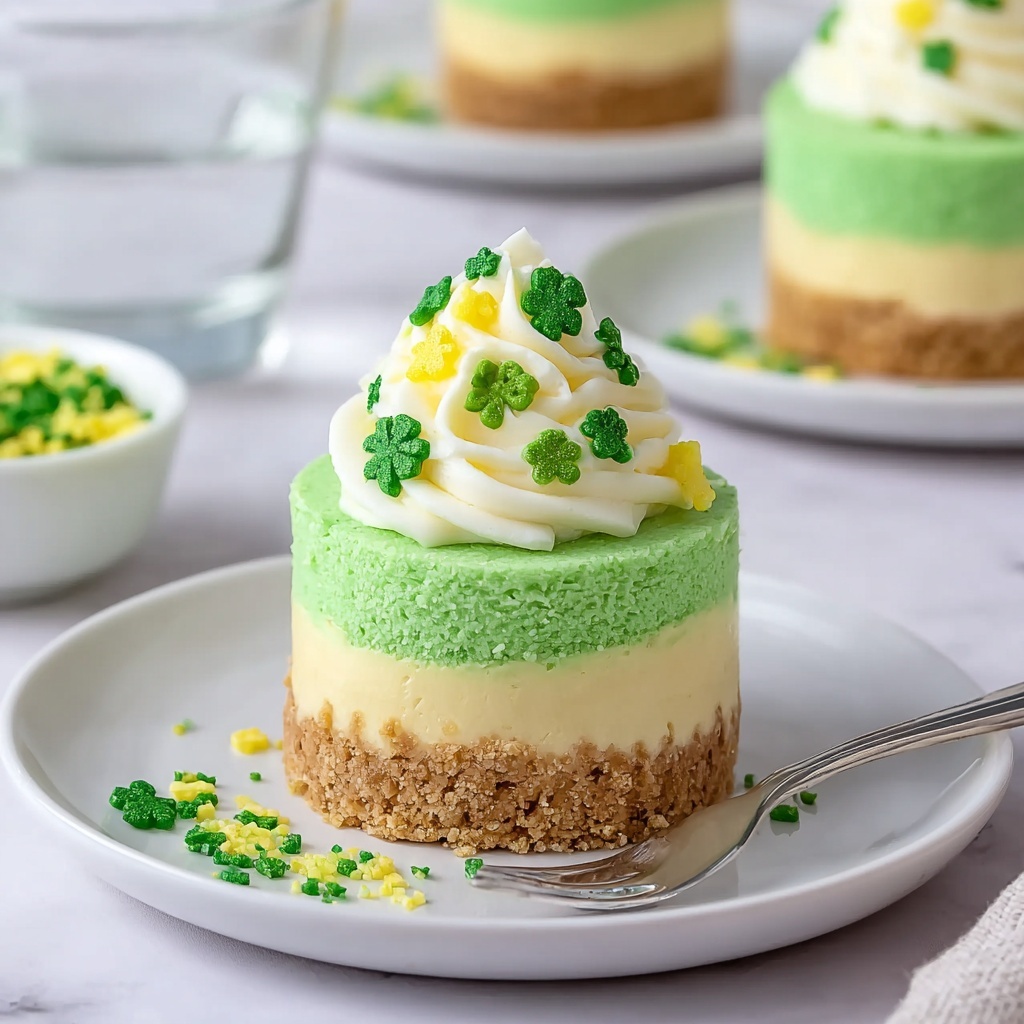
If you’re ready to wow your friends and family with a festive treat that’s as charming as it is delicious, look no further than these Mini St. Patrick’s Day Cheesecakes: No-Bake Green Layered Dessert Recipe. Each bite offers a creamy, dreamy texture with vibrant green layers that perfectly capture the spirit of the holiday. This recipe combines simplicity with show-stopping presentation, making it an ideal sweet ending for any St. Patrick’s Day celebration or anytime you want to indulge in a delightful, no-bake dessert that feels special.
Ingredients You’ll Need
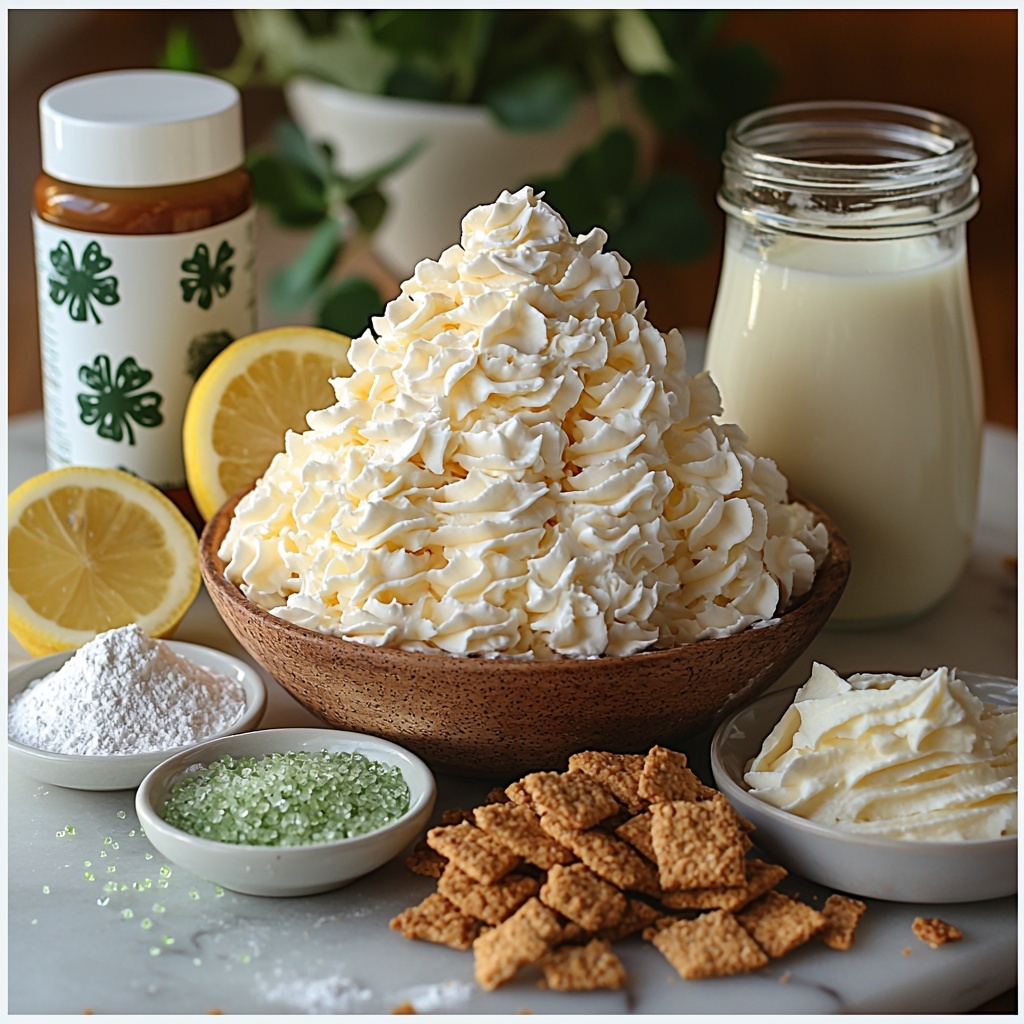
The magic behind Mini St. Patrick’s Day Cheesecakes lies in a handful of straightforward ingredients that work together to create texture, flavor, and those irresistible green layers. Each component plays its part, from the crunchy base to the luxuriously smooth filling and cheerful finishing touches.
- Graham cracker crumbs (1 ½ cups): This creates a buttery, crispy crust base that gives a wonderful texture contrast.
- Granulated sugar (¼ cup): Adds just the right amount of sweetness to the crust.
- Unsalted butter, melted (½ cup): Binds the crust together and adds richness without overpowering flavors.
- Cream cheese, softened (16 ounces): The star ingredient delivers that silky and tangy essence of cheesecake.
- Powdered sugar (½ cup): Sweetens and lightens the cream cheese filling for a fluffy finish.
- Vanilla extract (1 teaspoon): Brings depth and warmth to the cheesecake layers.
- Lemon juice (1 tablespoon): Adds a bright hint of acidity to balance the richness.
- Cheesecake-flavored instant pudding mix (3.4 ounces): Boosts the creamy texture and strengthens the cheesecake flavor.
- Half-and-half (1 cup): Helps the pudding set and adds luscious creaminess.
- Green food coloring: Neon lime and aqua green shades give those signature layered colors a festive pop.
- Buttercream frosting (½ cup): A sweet, smooth topper to add buttery richness and help hold decorations in place.
- Green sprinkles: For a playful, crunchy garnish that’s perfect for the occasion.
- Optional edible gold flakes or chocolate shamrocks: Add a touch of elegance or whimsy for extra festive flair.
How to Make Mini St. Patrick’s Day Cheesecakes: No-Bake Green Layered Dessert Recipe
Step 1: Create a Crunchy Crust
Start by mixing your graham cracker crumbs, sugar, and melted butter in a bowl until everything is combined into a sandy mixture that holds together when pressed. This crunchy crust is essential for adding texture and a buttery foundation to your cheesecakes.
Step 2: Press and Chill the Crust
Press this mixture evenly into the bottoms of 12 lined muffin cups or mini cheesecake molds. Press firmly to ensure it sticks well and forms a sturdy base. Then pop these into the freezer for about 10 minutes while you prep the filling; chilling helps the crust set so it won’t crumble when you layer on your delicious cheesecake mix.
Step 3: Beat the Cream Cheese Mixture
Next, in a large bowl, beat the softened cream cheese with vanilla extract and lemon juice until perfectly smooth and creamy. This step is crucial for that ultra-luxurious texture that cheesecake lovers crave.
Step 4: Prepare the Pudding Base
In a separate bowl, whisk together the cheesecake-flavored instant pudding mix with half-and-half. Stir until it thickens and becomes smooth so it will meld beautifully with the cream cheese mixture.
Step 5: Combine and Sweeten
Pour the pudding mix into your cream cheese bowl and beat everything until it’s completely combined. Then slowly add powdered sugar while mixing until the filling feels light, airy, and fluffy—the perfect consistency to layer into those crusts.
Step 6: Color Your Layers
Divide this luscious batter evenly into three bowls. Keep one plain white, tint one with aqua green food coloring, and the last with neon lime, adding a drop of aqua green for a swirling effect. These colors make your mini cheesecakes festive and eye-catching.
Step 7: Layer the Cheesecakes
Begin layering each mini cheesecake with a spoonful of white batter, smoothing it gently. Freeze briefly, then add the aqua green layer, smooth again, freeze, and finish with the neon lime topping. The quick freezes between layers keep colors crisp and ensure tidy, distinct layers that look as wonderful as they taste.
Step 8: Chill to Set
Transfer the assembled mini cheesecakes to the refrigerator and let them chill for at least 4 hours or overnight. This step is key for the cheesecake filling to firm up, creating that perfect hold you want without baking.
Step 9: Frost and Decorate
Once chilled, pipe a little buttercream frosting atop each cheesecake. Now comes the fun part—sprinkle green sprinkles, edible gold flakes, or chocolate shamrocks for festive pops of texture and sparkle. This finishing touch makes these treats party-ready in every sense.
Step 10: Serve and Enjoy
Carefully remove the mini cheesecakes from their molds and place them on a serving platter. Serve these cool, creamy delights chilled for the best texture and flavor experience, and watch as your guests fall in love bite after bite.
How to Serve Mini St. Patrick’s Day Cheesecakes: No-Bake Green Layered Dessert Recipe
Garnishes
Besides the green sprinkles and edible gold flakes, fresh mint leaves or a light dusting of powdered sugar can add that extra touch of elegance. A little creativity with garnishes goes a long way in elevating the visual appeal and flavor profile of these mini delights.
Side Dishes
These cheesecakes pair beautifully with a cup of freshly brewed Irish coffee or a light citrus salad. The bright notes of the salad can help balance the richness of the dessert, while warm coffee adds a cozy complement to this festive treat.
Creative Ways to Present
Try serving these cheesecakes on a tiered dessert stand decorated with shamrock-shaped cutouts and green ribbons. Alternatively, place each cheesecake in a clear mini cup with a tiny spoon and a sprig of fresh mint for an elegant individual serving at a party.
Make Ahead and Storage
Storing Leftovers
Your Mini St. Patrick’s Day Cheesecakes will keep beautifully in an airtight container in the refrigerator for up to 3 days. Keep them chilled to preserve their texture and freshness.
Freezing
If you want to prepare in advance, freeze the un-frosted cheesecakes for up to one month. When ready to serve, thaw them overnight in the refrigerator, then add the frosting and decorations fresh before serving.
Reheating
Since these are no-bake cheesecakes best served chilled, reheating isn’t necessary or recommended. Instead, allow them to come to room temperature for about 10-15 minutes before serving if preferred.
FAQs
Can I use different colors for the layers?
Absolutely! Feel free to experiment with any shades of green or even add a white or yellow layer to personalize your Mini St. Patrick’s Day Cheesecakes: No-Bake Green Layered Dessert Recipe. Just ensure the colors are food-safe and complement the flavor.
What if I don’t have cheesecake-flavored pudding mix?
No worries. You can substitute vanilla pudding mix, but the cheesecake-flavored version elevates the tangy richness and texture that makes this recipe so special.
How do I prevent the layers from mixing together?
Freezing briefly in between layering is the secret. This step helps each colored layer firm up before adding the next, ensuring distinct, vibrant layers without blending.
Can I make these dairy-free?
While the traditional recipe relies on cream cheese and half-and-half, you could try dairy-free cream cheese and a non-dairy milk substitute. Just be aware texture and flavor might vary slightly.
Is there a way to make these gluten-free?
Yes! Swap out regular graham cracker crumbs for gluten-free ones. Just check that all other ingredients are gluten-free to keep the recipe safe for your needs.
Final Thoughts
These Mini St. Patrick’s Day Cheesecakes: No-Bake Green Layered Dessert Recipe are a delightful way to add a splash of color and a lot of joy to your holiday table. With their creamy layers, simple ingredients, and festive look, they are sure to become a beloved tradition. Give them a try and enjoy both the process and the smiles they bring!
Print
Mini St. Patrick’s Day Cheesecakes: No-Bake Green Layered Dessert Recipe
- Prep Time: 20 minutes
- Cook Time: 4 hours (chilling time)
- Total Time: 4 hours 20 minutes
- Yield: 12 mini cheesecakes
- Category: Dessert
- Method: No-Cook
- Cuisine: American
Description
Celebrate St. Patrick’s Day with these delightful Mini No-Bake Cheesecakes featuring a colorful swirl of lime and aqua green layers. These bite-sized cheesecakes have a crunchy graham cracker crust and a luscious, creamy filling made with cream cheese and cheesecake-flavored pudding mix. Easy to assemble and perfect for a festive dessert offering, they are decorated with buttercream frosting and festive green sprinkles.
Ingredients
Crust
- 1 ½ cups graham cracker crumbs
- ¼ cup granulated sugar
- ½ cup unsalted butter, melted
Filling
- 16 ounces cream cheese, softened
- ½ cup powdered sugar
- 1 teaspoon vanilla extract
- 1 tablespoon lemon juice
- 1 package (3.4 ounces) cheesecake-flavored instant pudding mix
- 1 cup half-and-half
- Green food coloring (neon lime & aqua green for swirled layers)
Topping & Decoration
- ½ cup buttercream frosting (store-bought or homemade)
- Green sprinkles
- Optional: Edible gold flakes or chocolate shamrocks
Instructions
- Mix Crust: In a bowl, combine graham cracker crumbs, granulated sugar, and melted butter until all ingredients are evenly mixed.
- Press Crust into Molds: Divide the crust mixture evenly by pressing it firmly into the bottoms of 12 lined muffin cups or mini cheesecake molds to form the base.
- Freeze Crust: Place the crust-filled molds in the freezer for 10 minutes to set while you prepare the filling.
- Prepare Cream Cheese Base: In a large bowl, beat the softened cream cheese with vanilla extract and lemon juice until the mixture is smooth and creamy.
- Make Pudding Mixture: In a separate bowl, whisk together the cheesecake-flavored instant pudding mix with half-and-half until the mixture thickens.
- Combine Mixtures: Gradually add the pudding mixture into the cream cheese base, beating until they are fully combined.
- Add Powdered Sugar: Slowly mix in the powdered sugar, beating until the filling is light and fluffy.
- Color the Filling: Divide the cheesecake batter evenly into three bowls. Leave one plain (white), tint one with aqua green food coloring, and tint the last with neon lime plus a drop of aqua green food coloring.
- Layer the Filling: Starting with the plain white batter, spoon layers into each prepared crust in the muffin molds; add the aqua green layer next, then the neon lime green layer on top, smoothing each layer. Freeze briefly between layers to help them set.
- Chill the Cheesecakes: Refrigerate the layered mini cheesecakes for at least 4 hours or overnight to fully set and develop flavor.
- Decorate with Frosting: Once chilled, pipe buttercream frosting on top of each cheesecake for added sweetness and presentation.
- Add Final Decorations: Sprinkle green sprinkles over the frosting and optionally add edible gold flakes or chocolate shamrocks for festive flair.
- Serve: Carefully remove the mini cheesecakes from the molds and serve chilled for best flavor and texture.
Notes
- Use softened cream cheese to ensure a smooth filling with no lumps.
- Freezing between layers helps create defined, colorful swirls without mixing colors.
- The recipe can be made a day ahead – keep refrigerated until ready to serve.
- For a dairy-free alternative, substitute cream cheese and half-and-half with plant-based versions, and use dairy-free pudding mix and frosting.
- Adjust the amount of food coloring to reach your desired shade of green.
- Use mini cheesecake molds or lined muffin tins for perfect individual servings.


