
If you’ve ever craved that perfect combination of rich chocolate and creamy peanut butter in a bite-sized treat, then you’re in for a real delight with this Homemade Peanut Butter Cups Recipe. It’s a simple, fun, and utterly satisfying way to recreate that classic candy experience right in your own kitchen, using just a handful of ingredients that meld together beautifully. Whether you’re making these for a special occasion or just because, these peanut butter cups are guaranteed to win hearts with every delicious layer.
Ingredients You’ll Need
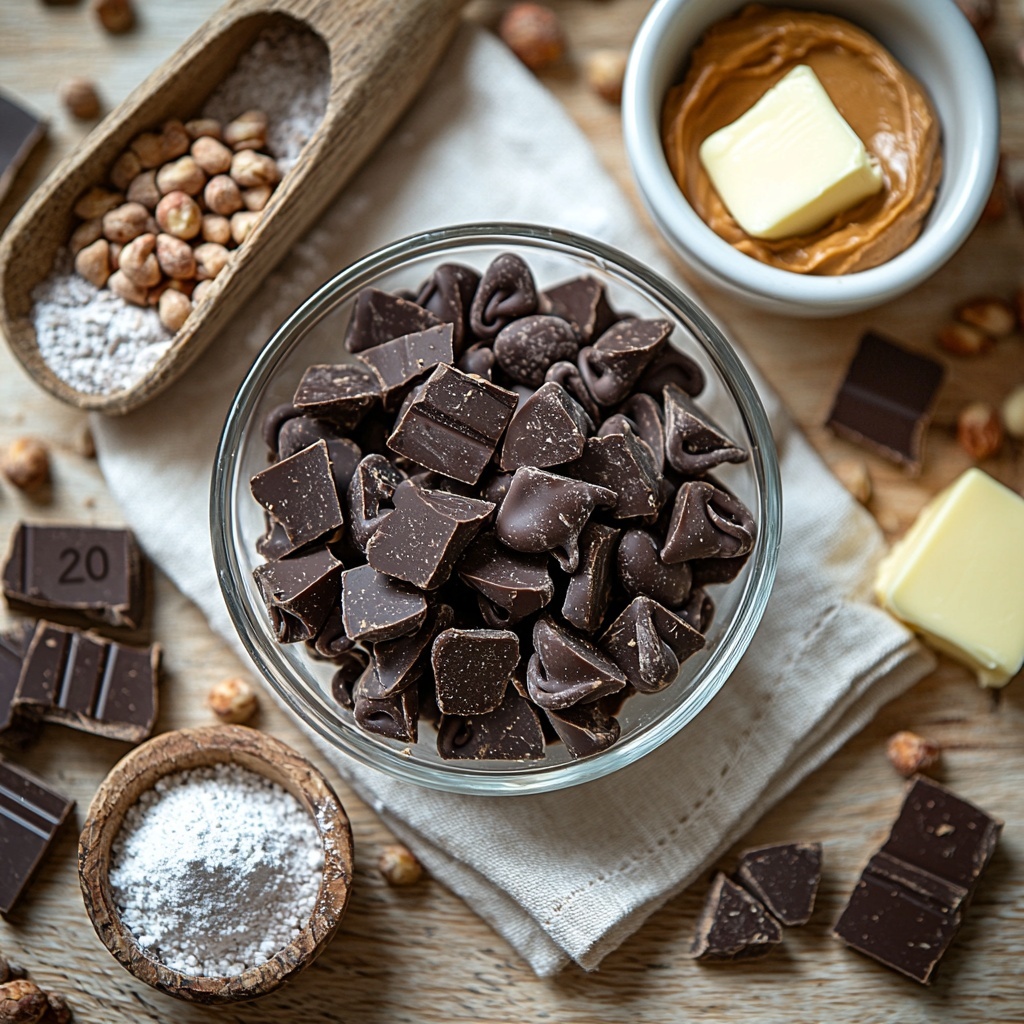
The magic of this Homemade Peanut Butter Cups Recipe comes alive thanks to a handful of straightforward ingredients, each playing a crucial role in texture, flavor, and overall indulgence. From the melt-in-your-mouth chocolate to the smooth and sweet peanut butter filling, every element counts.
- 14 ounces semi-sweet chocolate chips: Provides the rich, luscious chocolate coating with just the right sweetness and shine.
- 1 cup creamy peanut butter: Offers a smooth, nutty center that’s both rich in flavor and irresistibly creamy.
- 6 tablespoons powdered sugar: Adds a delicate sweetness and helps achieve the perfect consistency for the peanut butter filling.
- 4 tablespoons butter: Brings a silky texture to the peanut butter mix and balances the sweetness with a subtle richness.
How to Make Homemade Peanut Butter Cups Recipe
Step 1: Prepare Your Muffin Pan
Start by lining a muffin pan with cupcake liners. This step helps the peanut butter cups hold their shape and makes them easy to remove when they’re ready. Using cupcake liners also reduces mess and helps create those classic, perfect little cup shapes.
Step 2: Melt Half the Chocolate Chips
In a microwave-safe bowl, melt half of your semi-sweet chocolate chips until smooth. This will become the base layer of your peanut butter cups, offering that luscious, glossy chocolate coating that sets the stage for all the deliciousness to come.
Step 3: Create the Chocolate Base Layer
Spoon the melted chocolate into each cupcake liner, filling about halfway. Once done, pop the tray into the freezer for 10 to 15 minutes. This chilling step firms up the chocolate, making it sturdy enough to hold the peanut butter filling without mixing together.
Step 4: Mix the Peanut Butter Filling
While the chocolate is setting, combine the creamy peanut butter, powdered sugar, and butter in a mixing bowl. Stir until the mixture becomes smooth and homogenous. This filling will be the sweet and creamy center that balances out the chocolate’s richness perfectly.
Step 5: Add the Peanut Butter Layer
Once the chocolate bottoms are firm, spoon the peanut butter mixture evenly over each one, covering the chocolate layer. Return the pan to the freezer for about 10 minutes. This brief freeze helps set the filling before topping with the final chocolate layer.
Step 6: Cover with Remaining Chocolate
Melt the remaining semi-sweet chocolate chips until smooth, then pour this melted chocolate over the peanut butter layer. Make sure to cover each cupcake completely so that every bite has a chocolate shell. The final chocolate layer seals the deal, creating that famous peanut butter cup look and taste.
Step 7: Chill Until Fully Set
Chill the peanut butter cups in the freezer for about 30 minutes or until fully set. This final chill firms up the chocolate top and the peanut butter filling, allowing the cups to maintain their shape and offer the perfect texture when you bite into them.
How to Serve Homemade Peanut Butter Cups Recipe
Garnishes
While these peanut butter cups are delightful on their own, you can sprinkle a pinch of sea salt on top before the last chocolate layer sets for a salty-sweet pop that heightens the flavors beautifully. Crushed roasted peanuts or a drizzle of extra melted chocolate lend a fun, decorative touch if you want to impress guests.
Side Dishes
Because these Homemade Peanut Butter Cups Recipe treats are quite rich, pairing them with fresh fruit or a bowl of berries provides a refreshing contrast. A dollop of whipped cream or a light scoop of vanilla ice cream can also complement their texture wonderfully during dessert.
Creative Ways to Present
For a charming presentation, place each peanut butter cup in a decorative mini cupcake liner and arrange them on a pretty platter or nestled inside a gift box lined with parchment paper. They make excellent homemade gifts or party favors and are always a crowd-pleaser.
Make Ahead and Storage
Storing Leftovers
Store any leftover peanut butter cups in an airtight container in the refrigerator for 3 to 4 days. Keeping them cold helps maintain the perfect texture of the chocolate shell and creamy center.
Freezing
If you want to keep these delicious treats for longer, they freeze beautifully. Wrap each cup in plastic wrap and store them in a freezer-safe container for up to a month. Thaw them in the fridge before serving to avoid condensation on the chocolate.
Reheating
There’s no need to reheat these peanut butter cups. They’re best enjoyed chilled or at room temperature to preserve their structure and taste. If they’ve been frozen, simply allow them to thaw slowly in the refrigerator before giving them a try.
FAQs
Can I use natural peanut butter for this recipe?
Absolutely! Just be aware that natural peanut butter contains more oil and may result in a slightly softer filling. You might want to adjust the powdered sugar or add a bit more to help stabilize the mixture.
Is it necessary to use a freezer in this recipe?
Yes, freezing is essential to set each layer properly. It helps the chocolate firm up quickly and prevents the peanut butter filling from mixing with the chocolate layers, ensuring a neat and delicious result.
Can I substitute dark chocolate for semi-sweet chocolate?
Yes! Dark chocolate will provide a richer, more intense flavor. Just keep in mind it might taste less sweet, so you could adjust the powdered sugar in the filling if you want to balance the bitterness.
How long will these peanut butter cups last at room temperature?
Because of the butter and peanut butter in the filling, it’s best to avoid keeping these at room temperature for more than a couple of hours. They are best stored refrigerated or frozen to maintain their freshness and texture.
Can I make these vegan or dairy-free?
Definitely! Use dairy-free butter substitutes and ensure the chocolate chips are vegan-friendly. The creamy peanut butter filling remains just as delicious with these swaps, making it a fantastic option for special diets.
Final Thoughts
I can’t recommend this Homemade Peanut Butter Cups Recipe enough if you’re looking for a fun, satisfying project that rewards you with delicious, crave-worthy treats. It’s a wonderful way to enjoy homemade candy that’s customizable and perfect for sharing with friends and family. So grab your ingredients, get cozy in the kitchen, and treat yourself to these perfect peanut butter cups that taste just like the classics but made with love.
Print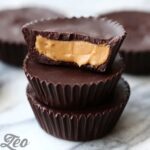
Homemade Peanut Butter Cups Recipe
- Prep Time: 10 minutes
- Cook Time: 0 minutes
- Total Time: 35 minutes
- Yield: 12 servings
- Category: Dessert
- Method: No-Cook
- Cuisine: American
- Diet: Vegetarian
Description
Deliciously rich homemade Peanut Butter Cups combining smooth creamy peanut butter with layers of luscious semi-sweet chocolate. Perfectly portioned into cupcake liners, these treats offer a delightful contrast of creamy and crunchy textures with a balance of sweet and salty flavors. Easy to prepare and ideal for satisfying your sweet tooth or gifting to loved ones.
Ingredients
Chocolate Layer
- 14 ounces semi-sweet chocolate chips, divided
- 4 tablespoons butter
Peanut Butter Filling
- 1 cup creamy peanut butter
- 6 tablespoons powdered sugar
Instructions
- Prepare Muffin Pan: Line a muffin pan with cupcake liners to create the shape and easy removal for your peanut butter cups.
- Melt First Half of Chocolate: In a microwave-safe bowl, melt half of the semi-sweet chocolate chips with 2 tablespoons of butter in short intervals, stirring until smooth and fully melted.
- Create Chocolate Base: Spoon the melted chocolate into the cupcake liners, filling them halfway. Place the pan in the freezer for 10-15 minutes to let the chocolate firm up solidly.
- Prepare Peanut Butter Mixture: In a mixing bowl, combine the creamy peanut butter, powdered sugar, and remaining 2 tablespoons of butter. Stir until the mixture is smooth and well blended.
- Add Peanut Butter Layer: Spoon the peanut butter mixture evenly over the set chocolate base in each cupcake liner. Return the pan to the freezer for another 10 minutes to allow the filling to firm.
- Melt Remaining Chocolate: Melt the remaining chocolate chips using the same microwave method until smooth, adding a small amount of butter if necessary to help with melting and texture.
- Top Peanut Butter Cups: Pour the melted chocolate over the peanut butter layer, making sure each cup is completely covered to seal the filling inside.
- Chill to Set: Place the peanut butter cups back into the freezer for approximately 30 minutes, or until fully set and firm to the touch.
- Serve and Enjoy: Remove the peanut butter cups from the freezer and let them sit for a few minutes at room temperature before enjoying for the best texture and flavor.
Notes
- For easier melting, stir the chocolate frequently during microwaving to prevent burning.
- If you prefer a crunchier texture, consider using crunchy peanut butter instead of creamy.
- Store peanut butter cups in an airtight container in the refrigerator or freezer to maintain freshness.
- Adding a pinch of salt to the peanut butter mixture can enhance the flavor.
- You can also use dark or milk chocolate chips as a variation depending on your preference.
