
“`html
If you’re looking for a vibrant, fun, and absolutely delightful dessert to brighten up your springtime gatherings, this Easter Jello-O Pie Recipe is exactly what you need. This charming pie layers colorful, fluffy Jell-O blends on a crisp graham cracker crust, creating the perfect balance of creamy texture and fruity flavor. It’s a nostalgic nod to classic gelatin desserts but elevated with whipped cream and a rainbow of hues that will have everyone excited for each bite. Whether you’re serving family or friends, this pie is guaranteed to be a standout centerpiece of your Easter celebration!
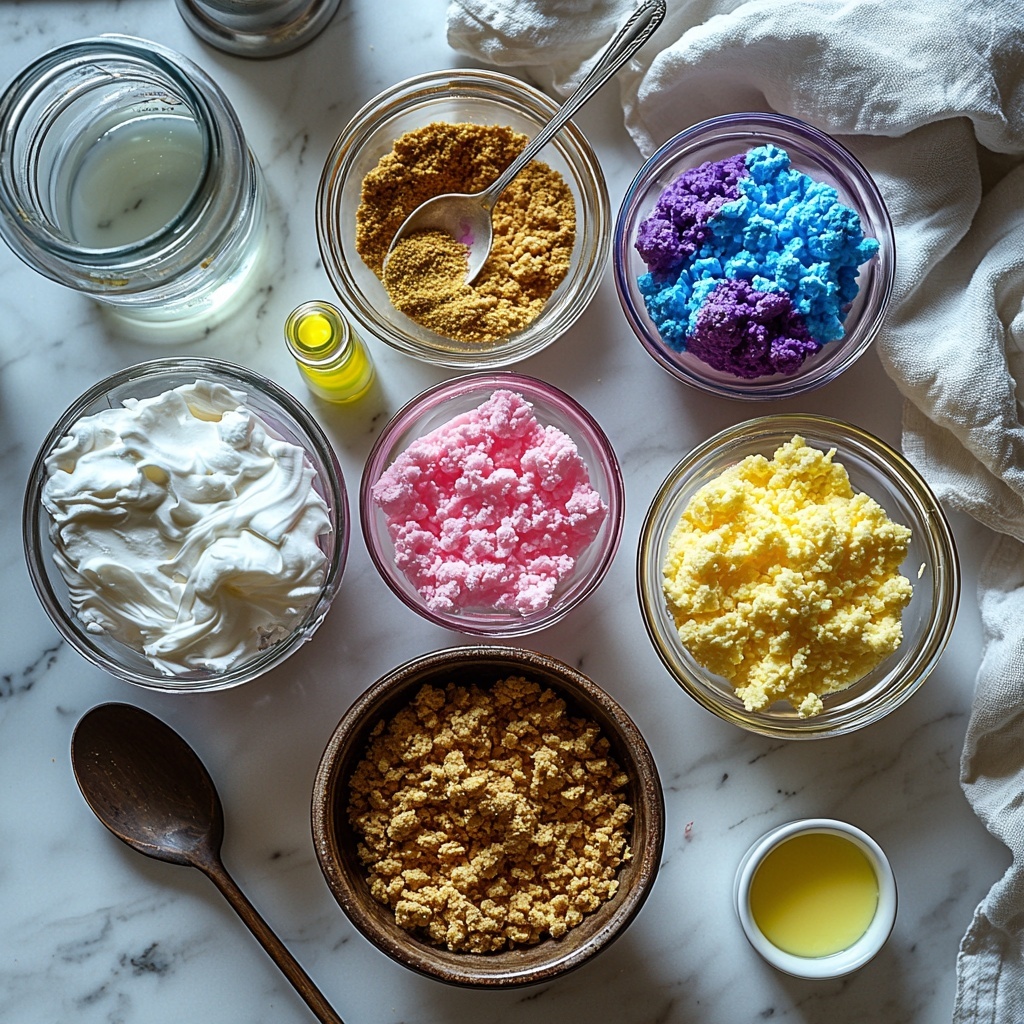
Ingredients You’ll Need
These ingredients are wonderfully simple yet essential to crafting this show-stopping Easter Jello-O Pie Recipe. Each one brings its own magic—whether it’s color, creaminess, or that perfect crust crunch—making the final dish a real crowd-pleaser.
- ½ package Pink Starburst Jell-O: Adds a juicy, bright berry flavor and the signature pink layer that catches the eye.
- 1½ ounces Blue Jell-O: Gives a refreshing blueberry tone that balances out the other sweet layers.
- 1½ ounces Yellow Jell-O: Brings a sunny citrus brightness that lifts the pie’s flavor overall.
- 1½ ounces Purple Jell-O: Deep grape notes that add a rich contrast and make the layers more dynamic.
- 16 ounces Whipped Cream (divided): Keeps the layers light and creamy for that melt-in-your-mouth texture everyone loves.
- 3 cups Boiling Water: Perfect for dissolving the gelatin powder smoothly without lumps.
- 1⅓ cup Cold Water (divided): Helps cool the mix just enough to combine with whipped cream without setting too fast.
- Yellow Food Dye (optional): Enhances the yellow Jell-O layer for a more vibrant presentation if you’re picky about color.
- Pink Food Dye (optional): Intensifies the pink layer when you want it to pop beautifully on the plate.
- 2½ cups Graham Cracker Crumbs: Creates the buttery, crunchy base that holds the pie together perfectly.
- 12 tablespoons Butter (1½ sticks): Binds the crust ingredients and gives a rich flavor and texture to the bottom layer.
How to Make Easter Jello-O Pie Recipe
Step 1: Prepare the Crust
Start by melting your butter until it’s fully liquified, then mix it thoroughly with graham cracker crumbs until you get that delightful sandy texture. Press this mixture firmly into a springform pan, shaping it neatly up the sides for that perfect crust edge. Pop it in the freezer so it can set while you prepare the colorful Jell-O layers.
Step 2: Mix Each Jell-O Color
Divide the Jell-O powders into four small bowls, one for each color. Pour ¾ cup boiling water into each and stir until every grain dissolves completely. Adding ⅓ cup cold water after mixing helps cool things down just right—this is key for the next step.
Step 3: Thicken the Layers
Refrigerate the Jell-O bowls for 20 to 30 minutes. The goal is to reach a thickened but not solid state—this ensures that when you add whipped cream, the mixture holds its shape but stays fluffy.
Step 4: Fold in the Whipped Cream
To each thickened Jell-O bowl, add 4 ounces of whipped cream and mix vigorously until the blend is smooth and creamy. If you’re all about making colors pop, this is when you’d stir in a few drops of yellow and pink food dyes, blending until you achieve the desired vibrancy.
Step 5: Layer and Chill
Start layering by spreading your first color (yellow is a fantastic opener, but feel free to switch it up!) evenly over the chilled crust. Pop the pie back in the freezer for 5 minutes to let that layer firm up well. Continue this process with the remaining colors, always chilling briefly in between to keep each layer distinct and perfect.
Step 6: Set the Pie
Once all layers are added, leave the pie in the freezer for 3 to 4 hours until fully solidified. This patience pays off because the pie needs to set to that ideal creamy yet firm consistency that’s so satisfying.
Step 7: Final Touch and Enjoy
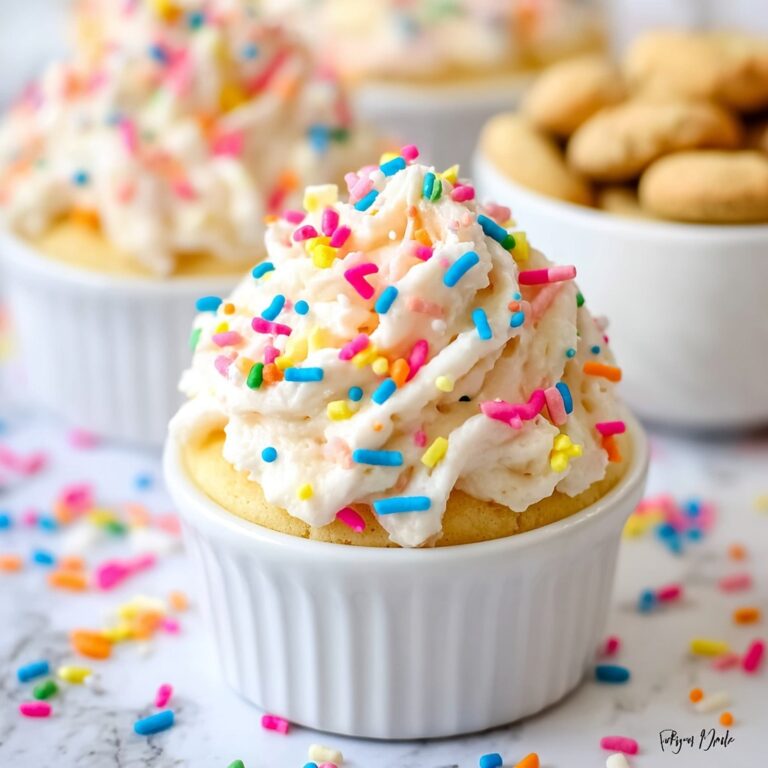
When ready to serve, top your pie with a generous layer of whipped cream for extra richness and flair. Now it’s time to enjoy the beautiful layers and flavors you’ve created—a true Easter delight!
How to Serve Easter Jello-O Pie Recipe
Garnishes
Add a few fresh berries or a sprinkle of colorful sprinkles on top of the whipped cream to enhance both visual appeal and flavor. Mint leaves also make a lovely fresh contrast against the sweet layers.
Side Dishes
This pie pairs wonderfully with light sides like fresh fruit salad or even a scoop of vanilla ice cream for a sweet, refreshing palate balance. If serving after a big meal, a simple green salad with citrus vinaigrette can refresh the palate between bites.
Creative Ways to Present
Consider serving this pie in clear individual cups for a quick and easy portable treat at family gatherings or potlucks. Alternatively, make a trifle version by layering cubes of Jell-O pie with whipped cream in a glass bowl for a stunning layered dessert everyone can scoop into.
Make Ahead and Storage
Storing Leftovers
Once assembled and fully set, the Easter Jello-O Pie Recipe keeps best when stored covered in the refrigerator for up to 3-4 days. This will maintain the fresh texture of the whipped cream and the firmness of the Jell-O layers.
Freezing
Freezing this pie isn’t recommended because the texture of the whipped cream and gelatin tends to break down upon thawing, leading to separation or a watery consistency. Stick to refrigerating to keep your pie at its best.
Reheating
This dessert is enjoyed best cold, so there’s no need to reheat. Just take it out of the fridge a few minutes before serving to soften slightly for the most pleasant texture and flavor.
FAQs
Can I use other Jell-O flavors instead of these?
Absolutely! Feel free to experiment with your favorite Jell-O flavors to personalize your Easter Jello-O Pie Recipe. Just be sure to keep the same quantities for balance.
Is it possible to make this pie without a springform pan?
You can use a regular pie dish, but a springform pan makes removing the pie much easier and helps keep the layers intact when serving.
Can I substitute whipped cream with a dairy-free alternative?
Yes! Use a dairy-free whipped topping to make this recipe suitable for those with dietary restrictions, and it will still create that luscious creamy texture.
How long does it take for each Jell-O layer to set in the freezer?
Allow about 5 minutes per layer in the freezer to ensure it firms up adequately before adding the next to maintain those lovely distinct layers.
Can I prepare this pie a day ahead of Easter?
Definitely! This pie actually benefits from sitting overnight in the fridge for the flavors to meld, and it will be perfectly set and ready to impress on Easter day.
Final Thoughts
This Easter Jello-O Pie Recipe is a joyous, colorful treat that brings smiles to every table. Its combination of creamy layers, buttery crust, and playful colors makes it an absolute must-try for your holiday celebrations. Don’t hesitate—make a pie, gather your loved ones, and share this nostalgic yet fresh dessert that’s as fun to make as it is to eat!
“`
Print
Easter Jello-O Pie Recipe
- Prep Time: 30 minutes
- Cook Time: 0 minutes
- Total Time: 4 hours 30 minutes
- Yield: 8 servings
- Category: Dessert
- Method: No-Cook
- Cuisine: American
Description
This vibrant Easter Jello-O Pie features colorful layers of flavored gelatin mixed with whipped cream, set on a buttery graham cracker crust. Perfect for a festive spring dessert, its multi-layered presentation is both visually stunning and delightfully creamy, making it an irresistible treat for holiday gatherings or family celebrations.
Ingredients
Crust
- 2½ cups Graham Cracker Crumbs
- 12 tbsp Butter (1½ sticks), melted
Jello Layers
- ½ package Pink Starburst Jell-O (approximately 2 ounces)
- 1½ ounces Blue Jell-O (½ package)
- 1½ ounces Yellow Jell-O (½ package)
- 1½ ounces Purple Jell-O (½ package)
- 3 cups Boiling Water (divided into ¾ cup per color)
- 1⅓ cup Cold Water (divided into ⅓ cup per color)
- 16 ounces Whipped Cream (divided, 4 ounces per color layer plus extra for topping)
- Yellow Food Dye (optional)
- Pink Food Dye (optional)
Instructions
- Prepare the Crust: Melt the butter in the microwave until fully liquified. In a medium bowl, combine the graham cracker crumbs and melted butter, mixing until the mixture has a thick, sand-like texture. Press the mixture evenly into the bottom and up the sides of a springform pan to form the crust. Place the crust in the freezer to firm up while preparing the Jello layers.
- Prepare Jello Mixtures: Divide the Jell-O powders into four small separate bowls (pink, blue, yellow, purple). To each bowl, add ¾ cup boiling water and stir until the powder dissolves completely and there is no graininess. Then, add ⅓ cup cold water to each bowl and stir gently once more.
- Thicken Jello: Place the bowls of dissolved Jell-O into the fridge for 20–30 minutes. The mixture should thicken but not solidify.
- Add Whipped Cream: Add 4 ounces of whipped cream to each thickened Jello mixture. Vigorously mix each mixture for a minute or two until fully combined and creamy.
- Add Food Coloring (Optional): If desired, stir in yellow food dye to the yellow Jello mixture and pink food dye to the pink Jello mixture to enhance colors until no streaks remain and the colors are vibrant.
- Layer the Pie: Starting with your chosen first color (traditionally yellow), spoon and spread an even layer of the Jello mixture over the crust. Place the pie back in the freezer for 5 minutes to set slightly. Repeat this layering and freezing process sequentially with the remaining colors, ensuring each layer firms before adding the next.
- Set the Pie: After all four layers are assembled, leave the pie in the freezer for 3 to 4 hours or until it is completely solidified through and fully chilled.
- Serve: Before serving, optionally top the pie with additional whipped cream. Slice and enjoy this festive, creamy layered Easter dessert!
Notes
- Using a springform pan helps in easily removing the cheesecake without damaging the layers.
- Do not allow the Jello layers to fully solidify before mixing in the whipped cream to maintain a smooth texture.
- Food coloring is optional but enhances the vibrancy of the pastel colors typical of Easter treats.
- Make sure each layer is slightly set before adding the next to prevent colors from mixing.
- This pie should be kept frozen until served to maintain its structure.


