
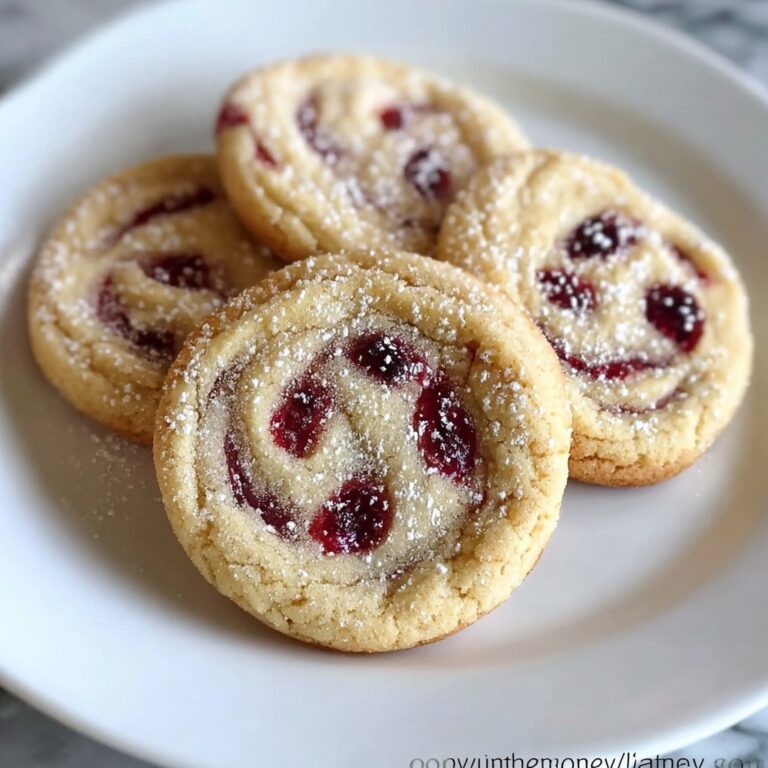
If you love the refreshing zing of mint perfectly paired with rich, indulgent chocolate, then this Chocolate Mint Pinwheel Cookies Recipe is an absolute must-try. These whimsical cookies are as delightful to look at as they are to eat, boasting a beautiful spiral of green and chocolate dough that melts in your mouth. Each bite balances the bright freshness of peppermint with the deep cocoa flavor, creating a treat that feels special yet approachable. Whether for a holiday cookie tray, a sweet gift, or just your afternoon pick-me-up, this recipe delivers a charming and scrumptious experience every single time.
Ingredients You’ll Need
Ingredients You’ll Need
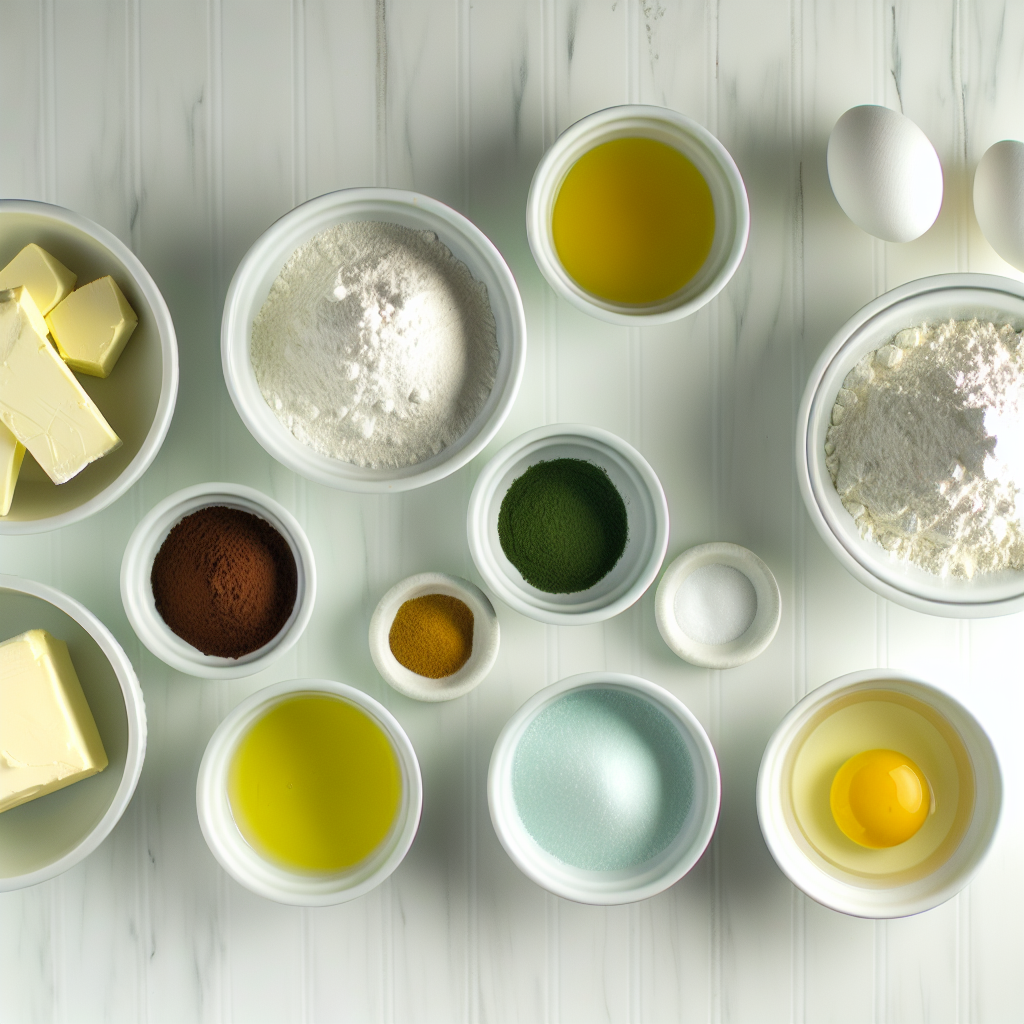
These ingredients are straightforward but crucial because each brings its own magic to the Chocolate Mint Pinwheel Cookies Recipe. From the creamy butter that ensures softness, to the vibrant green gel coloring that makes pinwheels pop, every element enhances the final result.
- 2 1/4 cups (286 grams) all-purpose flour: The sturdy base that shapes the cookie dough perfectly.
- 1/2 teaspoon baking powder: Just enough to give the cookies a light lift without spreading too much.
- 1/4 teaspoon fine sea salt: Balances sweetness and enhances chocolate flavor.
- 3 tablespoons (16 grams) unsweetened cocoa powder: Adds deep, rich chocolate taste and beautiful color.
- 2 sticks (226 grams) unsalted butter, at cool room temperature: For creamy texture and tender crumb.
- 3/4 cup (150 grams) granulated sugar: Sweetens the dough just right while contributing to that slight crispness on the edges.
- 1 large egg, at cool room temperature: Binds the ingredients together and adds richness.
- 1 teaspoon peppermint extract: The star that gives these cookies their iconic minty freshness.
- 1/2 teaspoon vanilla extract: Adds warmth and rounds out the flavors beautifully.
- 1 tablespoon milk: Helps achieve the perfect dough consistency and adds moisture.
- ¼-½ teaspoon green gel food coloring: Pick a vibrant shade to make your pinwheels irresistibly festive and fun.
How to Make Chocolate Mint Pinwheel Cookies Recipe
Step 1: Mix the Dry Ingredients
Start by whisking together the flour, baking powder, and salt in a medium bowl. This simple step ensures all the dry components are evenly distributed, vital for that perfect, consistent texture in every cookie.
Step 2: Cream Butter and Sugar
Using an electric mixer, beat the butter and sugar until the mixture is smooth and creamy—this usually takes about 2 minutes. Scrape down the sides occasionally to make sure everything blends beautifully for a light, fluffy dough base.
Step 3: Add Egg and Extracts
Beat in your egg, peppermint extract, and vanilla extract until everything is fully incorporated. This step infuses the dough with those signature mint and vanilla notes that will shine through in the final cookies.
Step 4: Combine Wet and Dry Ingredients
Slowly add the dry flour mixture to your wet ingredients on the lowest mixer speed. Mix just until combined to avoid overworking the dough, which can lead to tougher cookies.
Step 5: Divide and Color the Dough
Split your dough into two equal halves. Tint one with the green gel food coloring a little at a time until you reach your favorite shade. Add the cocoa powder and milk to the other half, mixing gently until smooth and chocolatey.
Step 6: Chill the Dough
Form each colored dough half into a rectangle and wrap them securely in plastic wrap. Refrigerate for about an hour until they are firm but still pliable—this makes rolling and layering much easier.
Step 7: Roll Out the Dough
On a silicone mat lined with parchment paper, roll both dough halves into 8×14-inch rectangles about 1/4-inch thick. Keep them covered with plastic wrap to prevent drying, and chill for 10 minutes to ensure they’re ready for assembly.
Step 8: Layer the Dough
Carefully peel the plastic from the green dough and place it on fresh parchment. Layer the chocolate dough on top, aligning edges and pressing gently to remove any air pockets. Trim to even the edges for a neat pinwheel.
Step 9: Roll Into a Log
Using the parchment as a guide, roll the layered dough tightly into a log shape. Wrap in parchment or plastic wrap and freeze for about an hour until the log is firm enough to slice cleanly.
Step 10: Slice and Arrange
Preheat your oven while you line baking sheets with parchment. Remove the dough log from the freezer and cut into 1/2-inch thick slices. Arrange slices on the sheets, leaving space between each to allow for gentle spreading during baking.
Step 11: Bake the Cookies
Bake at 350°F (175°C) for 10 to 12 minutes. The cookies will set beautifully—don’t worry if the bottoms seem a bit flat at first, they puff up nicely in the oven.
Step 12: Cool Completely
Let the cookies cool for a couple of minutes on the baking sheet before transferring them to a wire rack. Cooling fully ensures they hold their shape and perfect pinwheel pattern without breaking.
Step 13: Store or Enjoy
Once cooled, store your cookies in an airtight container at room temperature for up to 5 days or freeze them for longer storage. Keep in mind they soften a little the longer they sit but remain irresistibly delicious.
How to Serve Chocolate Mint Pinwheel Cookies Recipe
Garnishes
Sprinkle these cookies lightly with powdered sugar for a delicate, snowy effect, or add a drizzle of melted white chocolate to elevate their festive charm. A few crushed peppermint candies on top can add crunch and extra minty flair.
Side Dishes
Pair your Chocolate Mint Pinwheel Cookies with a warm mug of hot cocoa or peppermint tea for a cozy, complementary flavor experience. They also shine alongside a scoop of vanilla ice cream for a quick and delightful dessert.
Creative Ways to Present
Arrange the cookies on a decorative platter lined with fresh mint leaves to enhance their cooling theme. For gift-giving, stack them in a clear jar with layers of colorful ribbon or package individually with small peppermint candies for a charming touch.
Make Ahead and Storage
Storing Leftovers
Keep your baked cookies fresh by storing them in an airtight container at room temperature. They will stay perfect for up to 5 days, making them ideal for enjoying through the week or bringing to a gathering.
Freezing
If you want to keep these pinwheel beauties longer, slice the chilled dough log and freeze the raw slices in a single layer on a tray before transferring to a freezer-safe bag. This way, you can bake fresh cookies on demand, anytime you want.
Reheating
To revive chilled or slightly softened cookies, warm them gently in a preheated 300°F oven for 3-5 minutes. This refreshes their texture and brings out that heavenly mint-chocolate aroma, making them taste freshly baked.
FAQs
Can I substitute the peppermint extract with something else?
You can swap peppermint extract for spearmint extract or a few drops of mint-flavored liqueur, but expect slight changes in flavor intensity. For a non-mint alternative, vanilla or almond extract can also be interesting twists.
What if I don’t have green gel food coloring?
Gel coloring gives you vibrant hues without thinning your dough. If you only have liquid food coloring, use sparingly to avoid a runny dough, or experiment with natural colorings like spinach powder, though the shade may differ.
Can I make these cookies gluten-free?
Yes! Replace the all-purpose flour with an equal amount of gluten-free flour blend that contains xanthan gum. Just be mindful that texture might be slightly different, but the flavor will remain just as delicious.
Why do the cookies soften the longer they sit?
Since these cookies contain butter and a tender crumb, they naturally soften as moisture redistributes. This makes them pleasantly chewy, but if you prefer crispness, enjoy them fresh or briefly re-toast before serving.
Is it okay to slice the dough thinner or thicker?
Absolutely! Thinner slices will yield crispier cookies, while thicker ones offer a chewier texture. Just adjust baking time accordingly—shorter for thinner, longer for thicker slices to achieve perfect doneness.
Final Thoughts
This Chocolate Mint Pinwheel Cookies Recipe is truly a joyful bake that’s perfect for sharing or savoring on your own. It combines simplicity with eye-catching beauty and festive flavor in a way that’s hard to resist. I hope you find as much happiness making and eating these cookies as I do. Go ahead and treat yourself to this classic combo of chocolate and mint—you’re going to love every bite!
Print
Chocolate Mint Pinwheel Cookies Recipe
- Prep Time: 20 minutes
- Cook Time: 11 minutes
- Total Time: 1 hour 31 minutes
- Yield: 24 cookies
- Category: Cookies
- Method: Baking
- Cuisine: American
Description
These Chocolate Mint Pinwheel Cookies combine rich cocoa-flavored dough with vibrant green mint dough, rolled together into elegant spirals. Perfectly tender and buttery, they offer a refreshing peppermint twist balanced with a chocolate base, making them a festive and delightful treat for holidays or any occasion.
Ingredients
Dry Ingredients
- 2 1/4 cups (286 grams) all-purpose flour
- 1/2 teaspoon baking powder
- 1/4 teaspoon fine sea salt
- 3 tablespoons (16 grams) unsweetened cocoa powder
Wet Ingredients
- 2 sticks (226 grams) unsalted butter, at cool room temperature
- 3/4 cup (150 grams) granulated sugar
- 1 large egg, at cool room temperature
- 1 teaspoon peppermint extract
- 1/2 teaspoon vanilla extract
- 1 tablespoon milk
Coloring
- ¼–½ teaspoon green gel food coloring (preferably Americolor Forest Green or Leaf Green)
Instructions
- Mix dry ingredients: In a medium bowl, whisk together the all-purpose flour, baking powder, and fine sea salt until evenly combined to ensure even rising and proper texture.
- Cream butter and sugar: In a large bowl, use an electric mixer on medium-high speed to beat the unsalted butter and granulated sugar until smooth and well combined, about 2 minutes. This step is crucial for a light, tender cookie. Scrape down the bowl sides occasionally.
- Add wet flavorings: Mix in the egg, peppermint extract, and vanilla extract until fully incorporated, giving your dough the signature minty and aromatic flavor. Scrape the bowl to keep everything even.
- Combine flour mixture: On low mixer speed, gradually add the flour mixture to the wet ingredients and mix just until incorporated. Overmixing can make cookies tough, so mix carefully.
- Color and flavor dough halves: Split the dough into two equal halves. Place one half in a small bowl and add green gel food coloring incrementally (start with ¼ teaspoon), mixing until the dough is evenly green; adjust to desired shade. To the other half, add unsweetened cocoa powder and milk, then beat on low speed until fully combined.
- Chill dough halves: Form each dough half into small rectangles, wrap tightly in plastic wrap, and refrigerate for about 1 hour until firm but pliable to make rolling easier.
- Roll dough rectangles: On a silicone baking mat lined with parchment paper, roll each dough half into an 8×14-inch rectangle about 1/4-inch thick. Keep covered with plastic wrap and chill in the fridge or freezer for about 10 minutes until dough is firm and pliable.
- Layer dough and trim: Remove plastic from the green dough and place on fresh parchment paper. Peel cling parchment off. Layer the chocolate dough onto the green dough, aligning edges closely and pressing gently to eliminate air gaps. Trim edges to even the rectangle if necessary.
- Roll into log and freeze: Using the parchment beneath as a guide, tightly roll the layered dough into a log. Wrap the log tightly in parchment or plastic wrap and freeze for about 1 hour to firm up for slicing.
- Prep for baking: Line baking sheets with parchment paper. Remove the chilled dough log from freezer, trim edges, then slice into 1/2-inch thick cookies. Arrange slices on baking sheets spaced about 2 inches apart. Place sheets in fridge or freezer while the oven preheats.
- Bake cookies: Preheat oven to 350°F (175°C). Bake cookies for 10 to 12 minutes until set. The bottoms may look slightly flat but cookies will puff up and become round during baking.
- Cool cookies: Transfer baking sheets to cooling racks and cool cookies on the sheet for 2 minutes, then move cookies to wire racks to cool completely ensuring the right texture.
- Store properly: Store the cooled cookies in an airtight container at room temperature up to 5 days or freeze for up to 1 month. Note that cookies soften the longer they sit, so for firmer texture consume sooner or keep frozen.
Notes
- Be careful not to overmix after adding flour to keep cookies tender.
- Use gel food coloring for vibrant color without altering dough consistency.
- Chilling the dough is essential for clean slicing and maintaining cookie shape.
- Cookies will soften over time—store in airtight container or freeze to maintain freshness.
- Ensure ingredients like egg and butter are at cool room temperature for best texture.


